Showing posts with label HACKINTOSH. Show all posts

Saturday, 25 October 2014

        Its been three years since I'm using my pc now and over the time obviously the performance have decreased gradually. the config I've been using is nothing great and i don't really plan buying extreme high end components as I'm not much of a hardcore user. the old configuration of my pc is as follows


processor : intel pentium dual e5700 3.0ghz
motherboard: gigabyte ga-g41m-combo
ram: corsair: 4gb 800mhz ddr3
gpu: nvidia zotac gt520
HDD: segate 250gb hdd + 1tb wd green
PSU: corsair vs450
case: circle( no specific model name)

          although this is pretty stone age as compared to toads standards but it handled everything that i use very efficiently. although it took hours to render a clip in FCP , it was still ok for me . but lately I've been facing some issues with some of the apps . as the apps are upgrading the requirement for resources are increasing so i was left with no choice but to go for an upgrade. i decided not to put lot of money and use most of the old parts from my pc so these is the new config of my pc.


processor :i3 3220
motherboard:ga-b75m-d3h
ram: corsair: kingston 4gb 1600mhz value ram
gpu: nvidia zotac gt520
HDD: segate 250gb hdd + 1tb wd green
PSU:corsair vs 450
case: zebronics guard


overview:
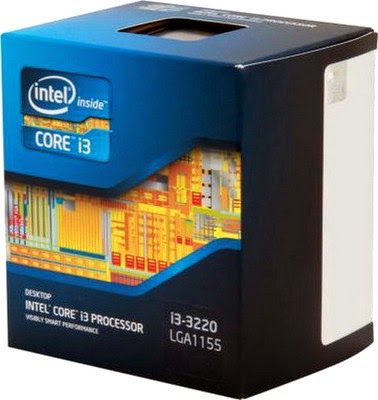
i3 3220:

          yes i know hassle is already out there but personally i found ivy bridge much better for mackintosh support for the budget builds as finding the right hassle motherboard could be difficult. the core i3 3220 is a dual core processor with 4 threads clocked at 3.22 ghz . the performance is a lot better than any other dual core I've used. the cpu handles all the apps with an ease and gives no problem of any force close.


ga-b75m-d3h

          the motherboard is best one for any budget mackintosh build as the setup becomes extremely simple. only change need to be made in bios is to change from IDE to AHCI. and the installation is carried out with an ease. also the audio and ethernet kext are present in multibeast so this becomes a definite yes for mackintosh. the board comes with 1 pcie 3.0 slot, hdmi,dvi,RGB, 4 DDR3 ram slots , 2 pci slots , 6sata ports out of which 2 are 6gbps, 2usb 3.0 ports and 4 usb 2.0 ports.
its not the cheapest board available but its definitely worth the money.


4gb kingston value ram

          I decided to go for the value ram instead of hyper x as i wanted to save as much money as possible. the ram is clocked at 1600mhz which is fairly decent . there is no heat sync for the ram but can't expect anything more for this budget.


zebronics guard

         zebronics guard is one of the cheapest case available in the market. although the cost is cheap but the exterior quality is excellent and anybody can be fooled to think its a  high end case. the looks are similar to those of cooler master cabinet and its a good thing. however the interior if cabinet is not that good . the i/o shield gave me lot of issues while fixing it for the first time. but again can't expect anything better for that price.


         and thats all of the new parts that i bought . rest of the things were fairly new so i decided not to change them. the performance I'm getting so far is excellent compared to my old system for obvious reason . the total cost of the system would be around 23000s which is good for budget users as the performance is not bad at all. well thats all for this build guys ill definitely upgrade my gnu next. if you want more build guide tutorials then please mention in the comment section bellow. don't forget to subscribe to cmreviews2394 on youtube. will be back with another tutorial soon until then cya later.


Friday, 17 October 2014

October 16th 2014, apple finally launched its latest and greatest desktop os os x 10.10 Yosemite. Yosemite comes with some major visual overhauls and ton of great feature. so lets end the wait and make a usb to install it on your hackintosh

lets start by downloading the required files

first thing obviously you need Yosemite. so go to app store and grab your copy of Yosemite

next thing you would need is a tool to make your usb drive working and bootable. for this i would trust unibeast anyway as its always been the universal method for making a working hackintosh usb. to download unibeast click here.


once both the downloads are completed lets start with making the usb bootable.

lets start by making the usb read. to do that go to disk utility and select your usb drive. now hit the partition and make one partition and make sure the format is mac os x journals.


once the usb is ready now fire up unibeast and go through the setup. basically thats accept > acceot> accept> continue

select your usb and then yosemite


if you are going to hackintosh your laptop then select the laptop support option or if u need then select the legacy usb . this depends on what hardware you require so make appropriate decision and hit continue again


enter your extremely secured password and sit back grab a drink because this process is going to take some really long time depending your hackintosh configuration.


if you see this message then congratulation you just made a bootable hackintosh Yosemite usb drive. thats all for now guys i'll be back with another tutorial to show you how to install Yosemite on your HDD.


Tuesday, 10 September 2013

          one of the most requested and most popular topic in the hackintosh world is that "how cheap could you build a hackintosh?". so in this tutorial we going to show you a hackintosh thats as cheap as possible but at the same time good in performance and fully compatible with mountain lion so lets start with the build

Processor


for the processor we would go with an intel core i3 2105 processor . this is a sandy bridge dual core processor but its a hyper threaded processor so thats going to make the operating system look it like a quad core processor. also it comes with intel hd 3000 graphics which is fully compatible with mountain lion so we wont be needing a dedicated gpu


motherboard


the motherboard is foundation of any build and we decided to go with Gigabyte-h61m-hd2. this motherboard is fully compatible with mountain lion which means audio and ethernet will work with the installation of multi beast. also it supports all sandy and ivy bridge processors with socket 1155 so if you want to buy a ivy bridge in future you dont have to buy a whole new board.

storage


ssd are not an option for budget users so we decided to go for segate barracuda 500gb 7200rpm hard drive. being a 7200rd drive this hard drive have decent read/write speeds and a good price and amount of storage to hold all your apps as well as your data.

memory


our system needs memory and we are going with transcend 4gb 1333mhz ddr3 ram. and we are going with a single 4gb stick instead of 2x2gb sticks just in case if you want to upgrade to 8gb in future you can use the other memory dim on the motherboard


power supply


power supply is something where we should never compromise and for that reson we are going with corsair vs450 power supply . 400w is more than what we would need on our system and corsair makes high quality power supplies

case
 for the case you can have a lot of options but the best option if to go for as cheap as possible for example we have cooler master elite 310 here for this build and with that we finish the parts and the total cost is down below


processor ------------7067
motherboard---------3250
ram--------------------2150
hard drive------------3950
power supply--------2500
case--------------------1900
total--------------------20817rs (325$)


Monday, 10 June 2013

can't afford a mac? no worries we will make a hackintosh

NOTE: THIS MIGHT BE A RISKY HACK AND NEED MULTIPLE ATTEMPTS TO DO IT. BUT IN THE END ITS JUST TRUE SATISFACTION.YOU HAVE TO FORMAT YOUR ENTIRE HARD DRIVE AS WE NEED TO MAKE NEW PARTITION SO BETTER GRAB A EXTERNAL HARD DRIVE AND TAKE BACKUP.

So lets start by downloading the required stuff

  • niresh mac os x lion (from kat.ph)
  • multibeast for lion (from tonymacx86.com)
  • audio and ethernet kext (search for it on google like this "motherboard mode audio and ethernet next and dsdt"}
  • kext utility (search in google)
  • mac os x lion combo update from apples website
so once downloaded transfer all files except the os x image file into a usb stick. make sure that you format the usb and keep the type as fat32 .

PRE INSTALLATION PROCESS

lets start by making the bootable dvd of mac os x

just right click on the image file and click open with > windows disk burner. now insert a blank dvd give it some time to read and once the light in the rom stops blinking click on the burn option in the window shown above. once done insert the dvd again and restart your computer and go into bios by hitting f12/delete or any other key depending on your motherboard. for gigabyte its delete key


it might be different for you depending on your motherboard. gigabyte users its might be similar. so once in bios u need to go to integrated peripharals and wherever you see ide press enter on it and select "ahcl". if you don't get that then don't worry even my motherboard don't have it. next thing make sure you enable usb mouse and keyboard


now change the boot order as cd rom 1st your hard drive as 2nd


Ok so once done that we are done with the pre installation process

INSTALLATION

so lets start the actual fun. now after saving the changes done in bios your pc must restart and will boot from your dvd rom. you will be presented by this

so now just hit enter and you will get the os x loading screen. if you get os x screen but you don't see a spinning wheel on bottom then go back restart your pc and at this screen type npci=0x2000.
once done that you must get this screen

at this stage it will take 7 to 10 minutes to proceed. just make sure you move the mouse after a minute or so to avoid freezing of  installation . so once don't you will get this


okey so not select your language and hit on arrow. again it will take lil time to go to next screen


now at this stage don't click on the arrow. see on the top click utilities and click disc disc utilities


again give it a lil time and a window will come and it will have info of all your drives click on the partition on right side. it will be current click on it and change to any number you want. i have 3 partitions 1 for mac and 1 fore windows 7 and one for data.
once you choose the number of partitions cloick on the first one and name it and below there is option called format click on it and change to mac os x journaled for mac. if you are making another drive food windows then click on it and change format to fat32.


once done selecting the partition click on option below the partitions and click on GUID PARTITION


now click ok and then accept . now close the disc utilities by clicking on the red dot on the top left. once again we will be back where we left thats the installation screen now click on the arrow and then agreement wil come. you can take your time to read it or just click agree


now choose the hard drive which you made for mac and hit the arrow and click continue/agree whatever it says


at this stage don't go anywhere just keep moving mouse after 1 or 3 minutes. you might feel it freeze as the status bar doesn't show any progress but don't worry it will. it takes about 25 to 30 minutes for installation and once done you will get this screen


now click on the restart button and make sure that you have your dvd still inside the rom. once restarting you will get this screen
just click the arrow keys to navigate to the mac os x drive which you just installed. and hit enter. again it will take a lil time and touwill get this screen


select your country and further steps are basic just enter the things as said. once completed inserting all the detail you will get this screen just hit the arrow


and now what you will get is this 


now you have mac os x in your pcbut its not over yet. now comes the difficult part.

POST INSTALLATION

now insert the usb stick which we made ready earlier


open kext utility folder and copy the next utility file on desktop 

 now same way copy the dsdt file on desktop 

now drag and drop the audio and ethernet next files on next utilities on desktop one after the other


  once done with all 3 files now open multybeast


now just hit continue continue continue agree,
 now this is most important and most crucial part. if u do anything wrong here everything you did so far will all go waste and u need to redo everything again. just select the things i did


once done click on continue and it will do the installation after that you will get this screen

once done you have successfully installed mac os x now eject the dvd and restart your HACKINTOSH.

on startup you will get this screen
 okey so with that set you are done enjoy using your flawless hackintosh. have fun enjoy.

after doing this just install mac os x combo update and sits very simple just hit continue continue continue and once don't it will ask to restart but wait don't restart now re run multi beast and do same thing and once thats done reboot the pc and now you will have a gorgeous 100% working mac os x and it just handles like a dream. this is look of my personal hackintosh


want to buy a usb ?

Thursday, 6 June 2013

      so did you saw the apple's mac mini of rs 39990?? it have just a 2.5GHz dual-core Intel Core i5( 2nd gen), a 500gb hard drive, intel hd graphics 400 ( IT SUCKS ), 4gb ram ?  isnt that  overpriced???  you still want mac os x /?? dont loose your hopes we will make a hackintosh for 31800rs which includes the original copy of mac os x.
       so firstly why would someone make a hackintosh instead of geting a mac?  well for obvious reason its overprice as stated above. secondly in a hackintosh you have ability to dual boot which means you can install windows 7 also on same hard drive if you are a gamer you will do it for sure so you get the best of both worlds. so lets build our hackintosh

NOTE: HACKINTOSH HAVE LOT OF HARDWARE LIMITATIONS, WE CANT JUST SIMPLY GRAB ANY HARDWARE AND EXPECT OS X TO RUN ON IT. ALTHOUGH THERE IS WIDE VARIETY OF PARTS AVAILABLE  NOW BUT STILL YOU NEED TO DO LOT OF RESEARCH BEFORE CHOOSING THE RIGHT PART. INTEL IS MOST PREFERRED BRAND FOR PROCESSORS WHICH DOESN'T MEAN AMD WONT WORK, SURELY IT WORKS ON AMD BUT THERE ARE VERY LESS CHANCES TO GET YOUR PROBLEMS SOLVED. THE PARTS STATED BELLOW ARE 100% WORKING TESTED AND USED PERSONALLY SO YOU CAN BLINDLY TRUST ME AND BUY THESE PARTS.

1- processor- i3 3220


YES we are going for an i3 instead of i5 on mac mini simply because the i5 apple uses is a sandy bridge and have clock speed of 2.9ghz as compared to our i3 3220 it have a clock speed of 3.3ghz which makes it lil bit on the better side .
2- motherboard- gigabyte GA-B75M-D3P  

its a micro atx motherboard with 4 usb 2.0 ports and 2 usb 3.0 ports and 100% compatible with mac os x and its cheapest one for the hackintosh so you save good amount of money here.

3- ram - corsair 4gb 240 pin ddr3

its a 13333mhz memory stick which will be enough for our build. we will have single stick of 4gb

4-GPU - Gainward NVIDIA GeForce GTX 650 1gb


you can go for any other gtx 650 but this is the cheapest one and works perfect.if you are choosing any other gpu make sure you check out its compatibility with os x because there are very limited number of gpu that works with os x

5-HDD - WD 1TB cauiar green

its a 1TB hdd. it must be enough for your mac os x and windows partition if you are having any.

6 - psu - CORSAIR BUILDER SERIES CX500

this is the 80 plus certified power supply by corsair and its really quiet one. i strongly recment you guing the 80+ certified power supply, they are a lil bit expencive but they are the best.

7-dvd drive (optional)

you can skip this because for installing mac os x lion or mountain lion you need usb. also to install windows 7 you can make your usb bootable from someone else's computer and install. so this one is up to you if you want spend 900rs or just skip it

8 - case - cooler master elite 300

once again the case is your personal preferance i suggest you buy as cheap as posible and add money on ther parts like the ram or the motherboard.

9. MAC OS X MOUNTAIN LION IMAGE ( original from mac app store )

yes i strongly recommend you to download the official mac os x mountain lion from the app store its just 20$ that is 1136rs and its the cheapest operating system out there . you can download from torrent like the niresh or hazard version but those are most likely more pron to kernel panics so its better to buy one. to buy it you need a mac to install it on your usb to do that i suggest you simply ask your friend who have a mac to download it for you from the mac app store. if you dont have any friend who have mac then download vmware image and install in vmware on your windows pc. if you dont want to do the above things and if you live in mumbai then you can contac me on facebook and i will download and make a usb stick for you

sp lets do the total

i3 3220k                                                         7236
GA-B75M-D3P                                             4484
4gbram                                                           1900
CORSAIR BUILDER SERIES CX500          3650
Gainward NVIDIA GeForce GTX 650           7500                        
1tb cavviar green                                             4000
case                                                                1900
osx   ML                                                        1136.
total = 31806rs = 559$
so there you go guys you saved 8184rs and made a hell lot better hackintosh than the mac mini

if you like our built up then dont forget to like us on facebook 

Know us

Our Team

Video of the Day

Contact us

Name

Email *

Message *